

Optional · do this once your CRM is live
Set up WhatsApp.
13 short steps, one at a time. Do what the step says, then click Next step.
Watch first2 minutes
Then do it below, one part at a time.
1Have these ready
Log in to your CRM, then click Next step.
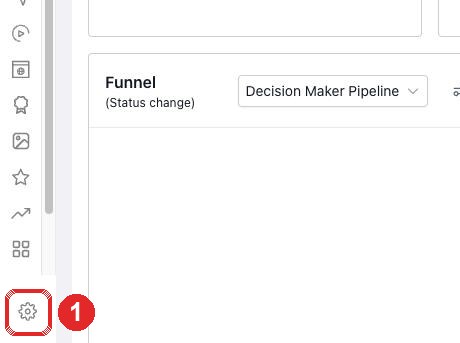
2Open Settings
- Click the gear (bottom left)
3Add your card
- Billing
- Payments
- The pencil
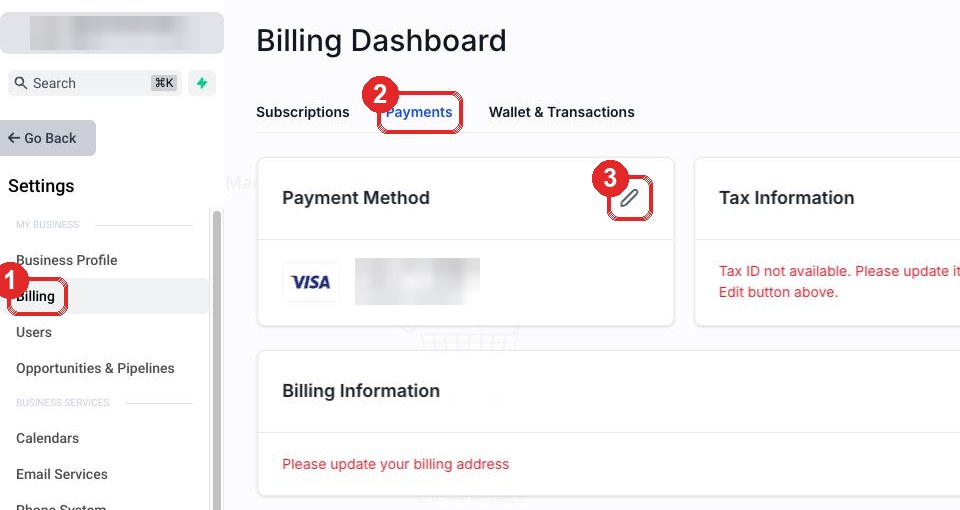
Type your card. Click Save.
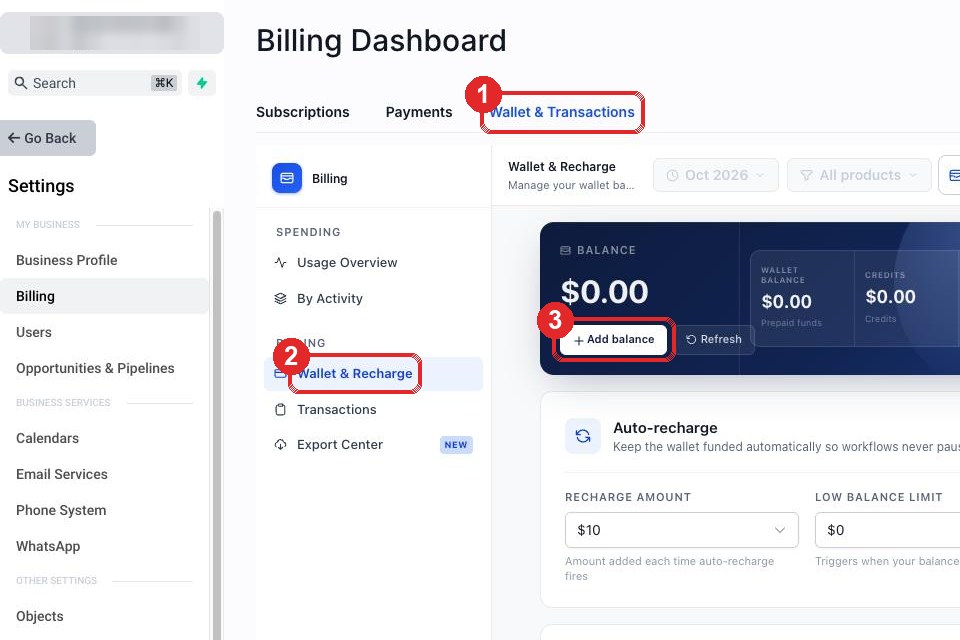
4Open your wallet
- Wallet & Transactions
- Wallet & Recharge
- Add balance
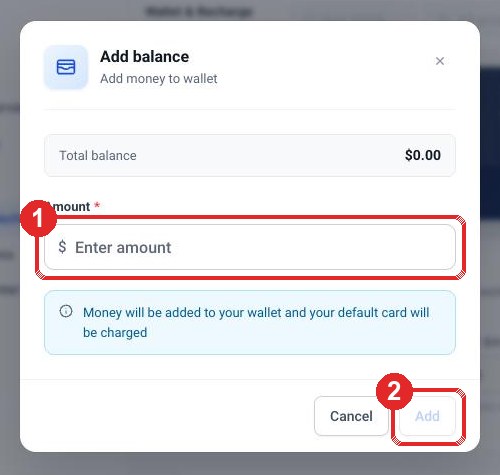
5Add credit
- Type 10
- Click Add
6Switch on WhatsApp
- WhatsApp (left menu)
- Scroll down. Click Pay & Subscribe
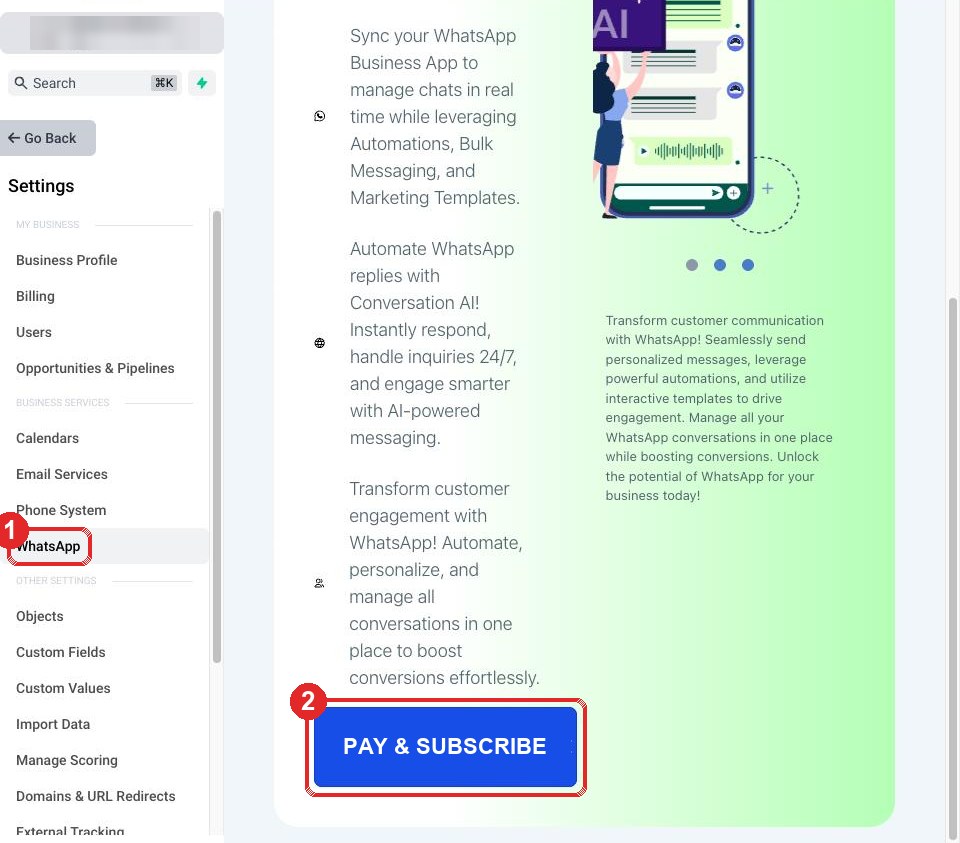
Confirm. Already says "How would you like to connect?" Then just click Next step.
7Open Phone System
- Phone System (left menu)
- Add Number
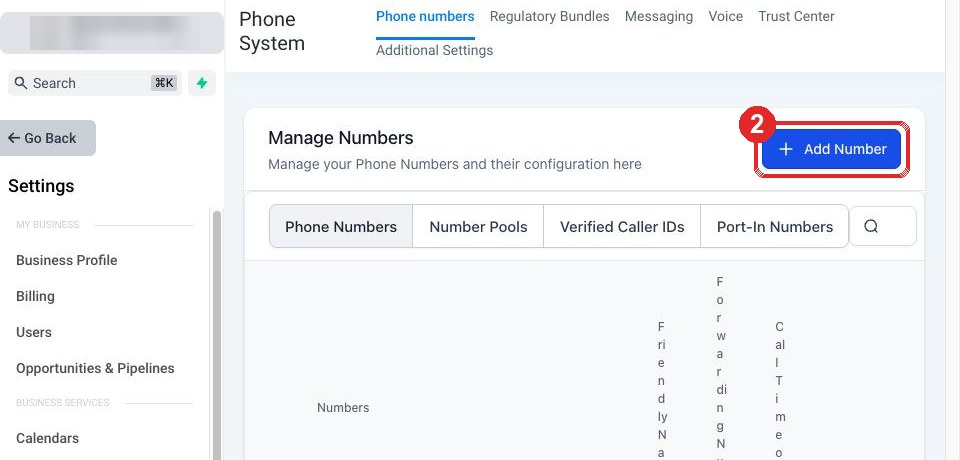
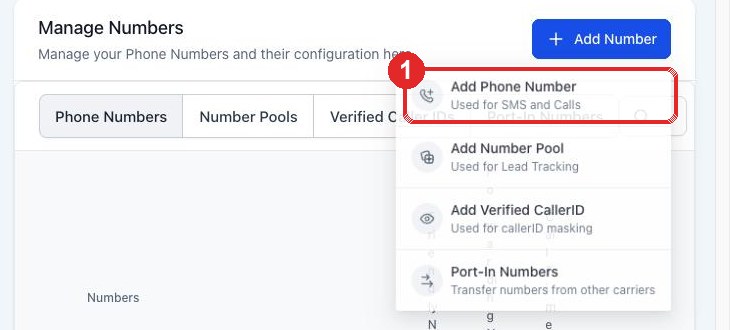
8Choose a number
- Add Phone Number
9Buy the number
- Leave United States
- Tick any number
- Proceed to Buy
- If an ID check opens, the business owner does it personally: ID card, then a live selfie. Do not refresh the page.
- If it offers A2P registration, skip it. WhatsApp does not need it.
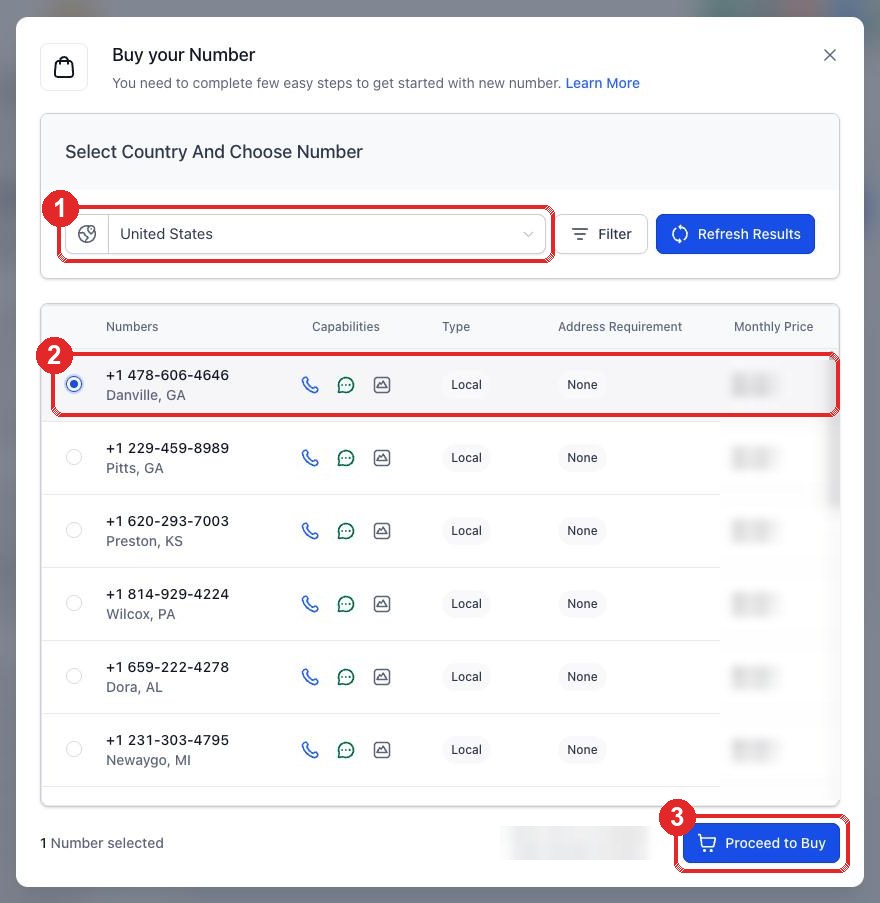
Confirm. Write the number down: you need it in step 11.
10Start WhatsApp
- WhatsApp (left menu)
- Create a new WhatsApp business account
- Next
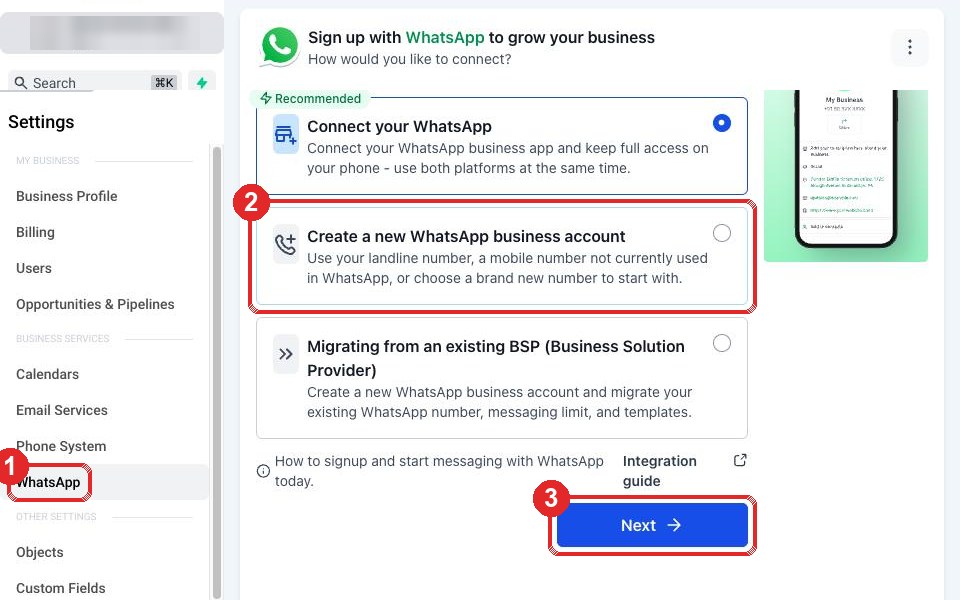
A Facebook window opens.
11In the Facebook window
- Log in with your Facebook
- Choose your business
- Make a new WhatsApp account. Name: your business name
- Type the number from step 9. Choose Text message
Keep this window open. Facebook now waits for a code.
12Copy the code
Open your CRM in a new tab.
- The speech bubble (left menu)
- All
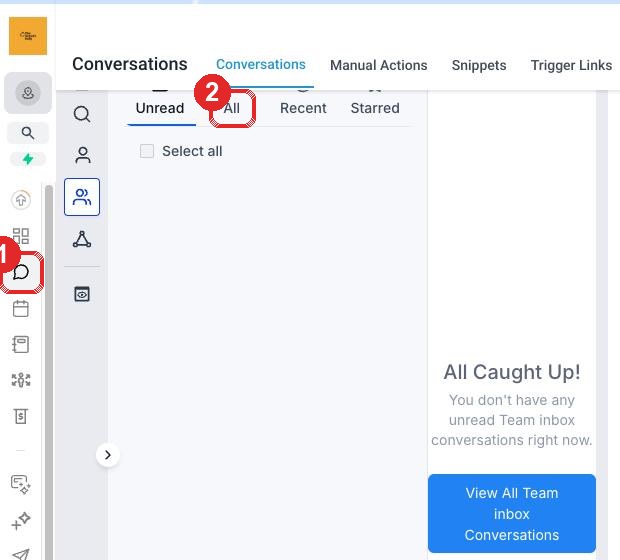
Open the newest message from Facebook. Copy the 6 numbers. Paste them in the Facebook window and finish.
13Check it worked
- Click the gear, then WhatsApp. It says Connected
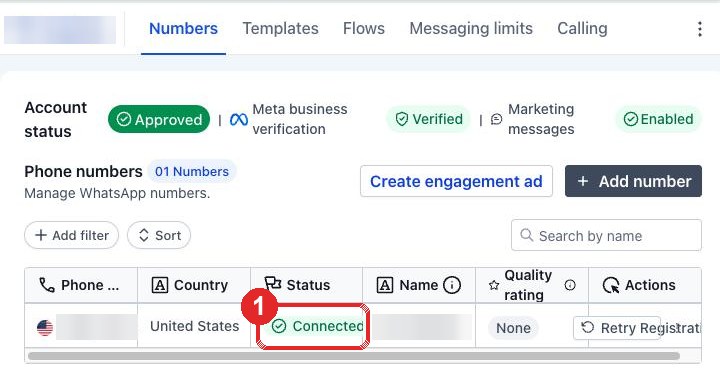
Reply to our email: WhatsApp connected. You are done.
Stuck?
Stop. Take a screenshot of your whole screen. Reply STUCK to our email with it. We reply the same working day.